Step-by-Step Guide: How to Convert PNG to SVG with GIMP
Step-by-Step Guide: How to Convert PNG to SVG with GIMP
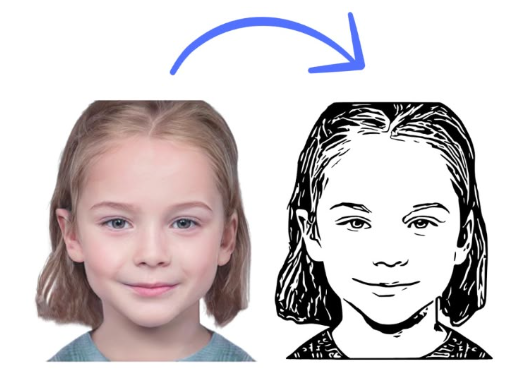
Welcome to Techfileconvertz, your ultimate source for in-depth tutorials and guides on file conversions. If you're a designer, developer, or anyone working with images, you might have come across situations where you need to convert your images into different formats for various uses. One common task is converting a PNG image into SVG format.
In this step-by-step guide, we’ll walk you through how to convert PNG to SVG with GIMP. GIMP (GNU Image Manipulation Program) is a powerful, open-source raster graphics editor that is perfect for manipulating images and converting them into other formats. Though GIMP is primarily a raster image editor, we can still use it to convert raster images like PNG to vector formats such as SVG.
Let’s dive in and see how to easily do this!

What is PNG?
Before we jump into the process, let’s briefly discuss what PNG is.
PNG, or Portable Network Graphics, is a popular raster image format used for storing digital images. Some of its key features include:
Lossless Compression: PNG files use lossless compression, meaning that the image quality is preserved during compression.
Transparency: PNG supports transparent backgrounds, making it ideal for web graphics, icons, and logos.
Wide Compatibility: PNG is widely supported by almost all browsers and graphic software.
However, since PNG is a raster format, it is made up of individual pixels. This makes it unsuitable for scaling without loss of quality, which is where SVG (Scalable Vector Graphics) comes into play.
What is SVG?
SVG, or Scalable Vector Graphics, is a vector-based image format. Unlike PNG, which is raster-based, SVG is made up of paths, shapes, and lines that are defined by mathematical equations. Some key features of SVG include:
Scalability: SVG images are resolution-independent, meaning they can be scaled infinitely without any loss of quality.
Smaller File Sizes: Since SVG files are based on vectors, they are often smaller than raster files like PNG, especially for simple graphics.
Editable: SVG files can be easily edited using a text editor or a vector graphic editor.
Web-Friendly: SVG images are commonly used in web design because they are lightweight and can be easily manipulated using CSS and JavaScript.
While PNG is great for detailed, high-quality images, SVG is the better option for graphics that need to scale across different devices and resolutions without losing quality.
Why Convert PNG to SVG?
There are several reasons you may want to convert a PNG image to SVG format:
Scalability: SVG images are ideal for logos, icons, and illustrations that need to be resized without losing quality.
Smaller File Size: If you have a simple graphic, converting it to SVG can result in a much smaller file size compared to PNG, which is great for web performance.
Better Editing Capabilities: SVG images are much easier to edit using vector editing software or code, giving you more flexibility in terms of design changes.
Web Usage: SVG is often preferred for web graphics due to its ability to scale across different screen sizes and resolutions without pixelation.
Now that we understand the reasons for converting PNG to SVG, let’s dive into the step-by-step guide to doing it with GIMP.
Step-by-Step Guide: How to Convert PNG to SVG with GIMP
Step 1: Install GIMP
If you don’t already have GIMP installed on your system, you can download it for free. GIMP is available for Windows, macOS, and Linux. Here’s how to get started:
Visit the official GIMP website.
Download the version appropriate for your operating system.
Install the software by following the on-screen instructions.
Once you’ve installed GIMP, open the program, and you’re ready to begin!
Step 2: Open Your PNG Image in GIMP
The first thing you need to do is open the PNG image you want to convert to SVG.
Launch GIMP.
Go to File > Open, and select the PNG image you want to convert.
Your PNG image will now be displayed in GIMP.
Step 3: Convert the PNG Image to a Vector Path
GIMP does not have direct support for creating SVG files, but it does allow you to convert raster images into vector paths. Here’s how you can do that:
Convert to Grayscale: If your PNG image is colorful, it’s a good idea to convert it to grayscale before tracing the paths. To do this:
Go to Image > Mode > Grayscale.
Adjust the Image Contrast: To help GIMP detect the edges better, adjust the image contrast. Go to Colors > Brightness-Contrast. Increase the contrast to make the edges more pronounced.
Select the “Color to Alpha” Tool: To remove the background if it’s not already transparent, go to Colors > Color to Alpha. This will allow you to make the background transparent.
Edge Detection: Now, you need to convert your image into paths. To do this:
Go to Tools > Selection Tools > Fuzzy Select.
Click on the image to select the area you want to convert to a path.
Create a Path: With your selection active, go to Edit > Copy. Then, go to Edit > Paste as > New Path. This will create a path that represents the shape of your image.
At this point, you have created a vector path from your raster PNG image.
Step 4: Refine the Path
Now that you have a path, you can refine it for better accuracy:
Go to the Paths dialog (usually on the right side of the screen). If it’s not visible, go to Windows > Dockable Dialogs > Paths.
You’ll see the path you created. Use the Path Tool (looks like a pen) to adjust the curves and details of your path.
Refine the path until it closely matches the shape you want. You can add more nodes, delete unnecessary ones, and adjust the curves for a cleaner conversion.
Step 5: Save the Path as an SVG File
Once your path is perfect, it’s time to export it as an SVG file:
Go to File > Export As.
Choose the SVG format from the file type options.
Name your file and choose a location to save it.
Click Export.
GIMP will save the vector path as an SVG file, which can now be used in various design projects.
Troubleshooting: Common Issues When Converting PNG to SVG
While the process of converting PNG to SVG in GIMP is relatively straightforward, you may encounter some common issues. Here are a few things to watch out for:
Image Quality: If the PNG image is too complex (e.g., a detailed photograph), the conversion to SVG might not produce a good result. SVG works best with simple graphics such as logos or illustrations.
Path Accuracy: Sometimes, the path that GIMP creates may not perfectly match the original image. If this happens, spend more time refining the path to ensure accuracy.
File Size: Although SVG files are typically smaller than PNG files, complex SVGs can become quite large if they contain a lot of paths or detailed shapes. If this happens, use an SVG optimizer like SVGO to reduce the file size.
Conclusion
In this Step-by-Step Guide: How to Convert PNG to SVG with GIMP, we've covered everything you need to know about converting your PNG images into scalable vector graphics. GIMP is a powerful tool for this task, allowing you to convert raster-based PNG images into vector paths that can be saved as SVG files.
Remember, the key to a successful conversion is starting with a simple image that can be easily traced into vector format. With some fine-tuning and practice, you’ll be able to convert complex PNG images into clean, scalable SVGs that are perfect for web design, graphic design, and more.
At Techfileconvertz, we hope you found this guide helpful. Keep experimenting with different images and conversion techniques, and don’t forget to explore other tutorials on our site to expand your skills. Happy converting!

Comments
Post a Comment