How to Create SVG from PNG for Cricut and Silhouette Projects
How to Create SVG from PNG for Cricut and Silhouette Projects
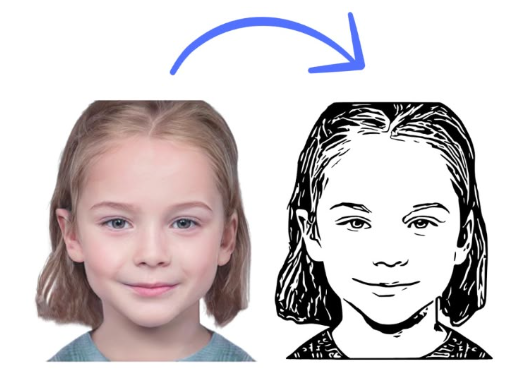
When working on Cricut and Silhouette projects, it's important to understand how to create the right file types to ensure smooth cutting and crafting processes. One of the most common tasks for crafters is converting images into SVG format. So, if you’re wondering how to Create SVG from PNG for Cricut and Silhouette projects, you’ve come to the right place!
At Techfileconvertz, we’re here to help you make your crafting journey easier. In this detailed guide, we will walk you through the steps, tools, and tips you need to create the perfect SVG from PNG images for your Cricut or Silhouette projects. Whether you're a beginner or experienced crafter, we’ve got you covered!

Why Convert PNG to SVG for Cricut and Silhouette?
Before we dive into the how-to, let’s first understand why converting a PNG file into an SVG format is essential for Cricut and Silhouette crafting. These machines are designed to work with vector images like SVGs, which are scalable and can be precisely cut. Here’s why SVGs are preferable:
1. Scalability: Unlike PNG files, which are raster images made up of pixels, SVG files are vector-based. This means SVG images can be resized without losing quality or becoming pixelated. This is crucial when you're working with various materials and need your designs to fit different dimensions.
2. Precision Cutting: Cricut and Silhouette machines work by reading the paths in vector images. SVG files consist of mathematical paths that the machines can follow, allowing for clean, precise cuts. PNG files, being raster images, do not provide this level of precision.
3. File Size and Efficiency: SVG files are usually smaller than PNG files, which helps reduce processing time on your cutting machine. Also, SVG files can be easily edited, optimized, and even animated (in digital projects), making them versatile for various crafting applications.
By converting a PNG to SVG, you give yourself the best chance to create high-quality, professional-looking Cricut and Silhouette projects.
Step-by-Step Guide on How to Create SVG from PNG for Cricut and Silhouette Projects
Now, let’s get into the step-by-step process of converting PNG files to SVG for your Cricut or Silhouette cutting projects. There are several ways to convert a PNG to SVG, and in this guide, we’ll explore different methods so you can choose the one that works best for you.
Method 1: Convert PNG to SVG Using Graphic Design Software (e.g., Adobe Illustrator)
One of the most precise methods for converting PNG files to SVG is by using graphic design software like Adobe Illustrator. This method is ideal for those who are comfortable working with vector-based software and want full control over the final result.
Step 1: Open the PNG in Adobe Illustrator
Open Adobe Illustrator and go to File > Open. Select the PNG file you want to convert and click Open. Your image will appear on the canvas.
Step 2: Trace the Image
Once the image is open, use the Image Trace feature to convert it into a vector. Select the image on the canvas, and then go to Window > Image Trace to open the Image Trace panel. You can adjust the settings depending on the complexity of the image. For instance, for simple designs like logos, you can use the “Black and White Logo” preset. For more detailed images, you may want to experiment with the settings until you achieve the desired result.
Step 3: Expand the Image
Once you’re happy with the trace, click the Expand button in the toolbar. This will convert the traced image into paths and shapes, turning it into a fully editable vector.
Step 4: Save as SVG
Finally, go to File > Save As, choose the SVG format from the drop-down menu, and click Save. Now, your image is ready to be imported into Cricut Design Space or Silhouette Studio.
Method 2: Convert PNG to SVG Using Inkscape (Free Option)
If you don’t have access to Adobe Illustrator, don’t worry! Inkscape is a free, open-source vector graphic design tool that you can use to convert PNG to SVG.
Step 1: Install Inkscape
First, download and install Inkscape from the official website (Inkscape).
Step 2: Import the PNG File
Open Inkscape and go to File > Open to import your PNG image.
Step 3: Trace the Image
With the image selected, go to Path > Trace Bitmap. In the Trace Bitmap dialog, you can choose different options, such as “Brightness Cutoff” or “Edge Detection,” to control how the software traces the image. Once you're satisfied with the result, click OK to confirm.
Step 4: Save as SVG
After the image is traced and converted to paths, go to File > Save As and choose SVG as the file format. Save your file, and now it's ready for use in Cricut or Silhouette software.
Method 3: Convert PNG to SVG Using Online Tools
For beginners or anyone who doesn’t want to install software, online tools are a quick and easy way to convert PNG files into SVGs. These tools are user-friendly and don’t require much experience.
Popular Online Tools to Convert PNG to SVG
Vector Magic: One of the most popular online tools for converting PNG to SVG. Simply upload your PNG, and Vector Magic will automatically trace and convert it to SVG format. You can download the SVG file once the conversion is complete.
Convertio: Another great option for converting PNG files to SVG. Upload your PNG, select the output format as SVG, and click Convert. Once done, you can download your SVG file.
Online-Convert: This online converter also allows you to convert PNG files to SVG. Simply upload your image, choose SVG as the format, and click Start Conversion.
These tools are perfect for those who need quick results and don’t need to tweak their images much after conversion.
Method 4: Convert PNG to SVG Using Command-Line Tools
For advanced users who are familiar with command-line tools, you can convert PNG to SVG using programs like Potrace. Potrace is an open-source tool for converting bitmap images into smooth, scalable SVGs.
Step 1: Install Potrace
Install Potrace on your system. You can download it from Potrace.org.
Step 2: Run the Conversion Command
Once installed, open the command prompt (or terminal on Mac/Linux) and run the following command:
lua
Copy
potrace input.png -s -o output.svg
This command will convert the PNG file input.png into an SVG file named output.svg.
Step 3: Use the SVG in Your Cricut or Silhouette Project
Now you can import the SVG file into Cricut Design Space or Silhouette Studio for use in your crafting projects.
Tips for Creating Perfect SVG Files for Cricut and Silhouette Projects
While converting your PNG files to SVG is relatively straightforward, there are a few tips and best practices that can help ensure your designs come out just right when you use them with Cricut or Silhouette.
1. Simplify Your Image
If your PNG image is complex, consider simplifying it before converting it to SVG. The more intricate the design, the more difficult it may be for your cutting machine to interpret the image. Simplified images will also reduce file size and make the cutting process smoother.
2. Use High-Quality PNG Images
Ensure that the PNG image you’re using is of high resolution and quality. Low-quality PNG images may result in blurry or inaccurate SVG conversions. Aim for images that are crisp and clear.
3. Remove Backgrounds
If your PNG file has a background, you’ll want to remove it before converting it to SVG. Cricut and Silhouette machines don’t need a background, and it will only add unnecessary complexity to the cutting process. Use a tool like Photoshop, GIMP, or an online background remover to clean up your image.
4. Test Your SVG Before Cutting
After you’ve created your SVG, it’s a good idea to test it out on your cutting machine using a scrap piece of material. This will ensure that the paths are clean and the design cuts properly. It’s always better to catch issues before you use expensive materials.
5. Optimize the SVG File
Once you’ve converted your PNG to SVG, you can optimize the file by removing any unnecessary nodes or paths. This will reduce the file size and make it easier for your Cricut or Silhouette machine to process. Use an SVG optimizer like SVGO or SVGOMG to clean up your files.
Conclusion
Knowing how to create SVG from PNG for Cricut and Silhouette projects is a valuable skill for any crafter. With the right tools and techniques, you can easily convert your favorite PNG images into scalable, editable SVG files that are perfect for cutting machines.
Whether you choose to use professional software like Adobe Illustrator, free tools like Inkscape, or quick online converters, there’s a method that suits every skill level. At Techfileconvertz, we hope this guide has helped demystify the process and set you up for success in your next Cricut or Silhouette project. Happy crafting, and enjoy creating beautiful designs that will make your projects shine!


Comments
Post a Comment